
I ended up making a High Capacity CPAP Water Tank (Or an “Auxiliary Tank”) because the manufacturer doesn’t make one. This post will show what I’ve done and talk about how it works a bit.
I use a CPAP and got a new one in 2024, and while it works much better, there is still one issue with it… If I set the humidity too high it runs out of water in less than six hours, which is how long I usually sleep. For a while I was filling a second tank and then swapping in the middle of the night when I awoke from the dryness. It works, but it’s not ideal…
So I wondered if the manufacturer had a larger capacity tank… they do not, but in the process I found someone who had come up with solutions, and I’m a maker so I had a go at it.
RonKMiller used a collapsible water bottle with some hose fittings…
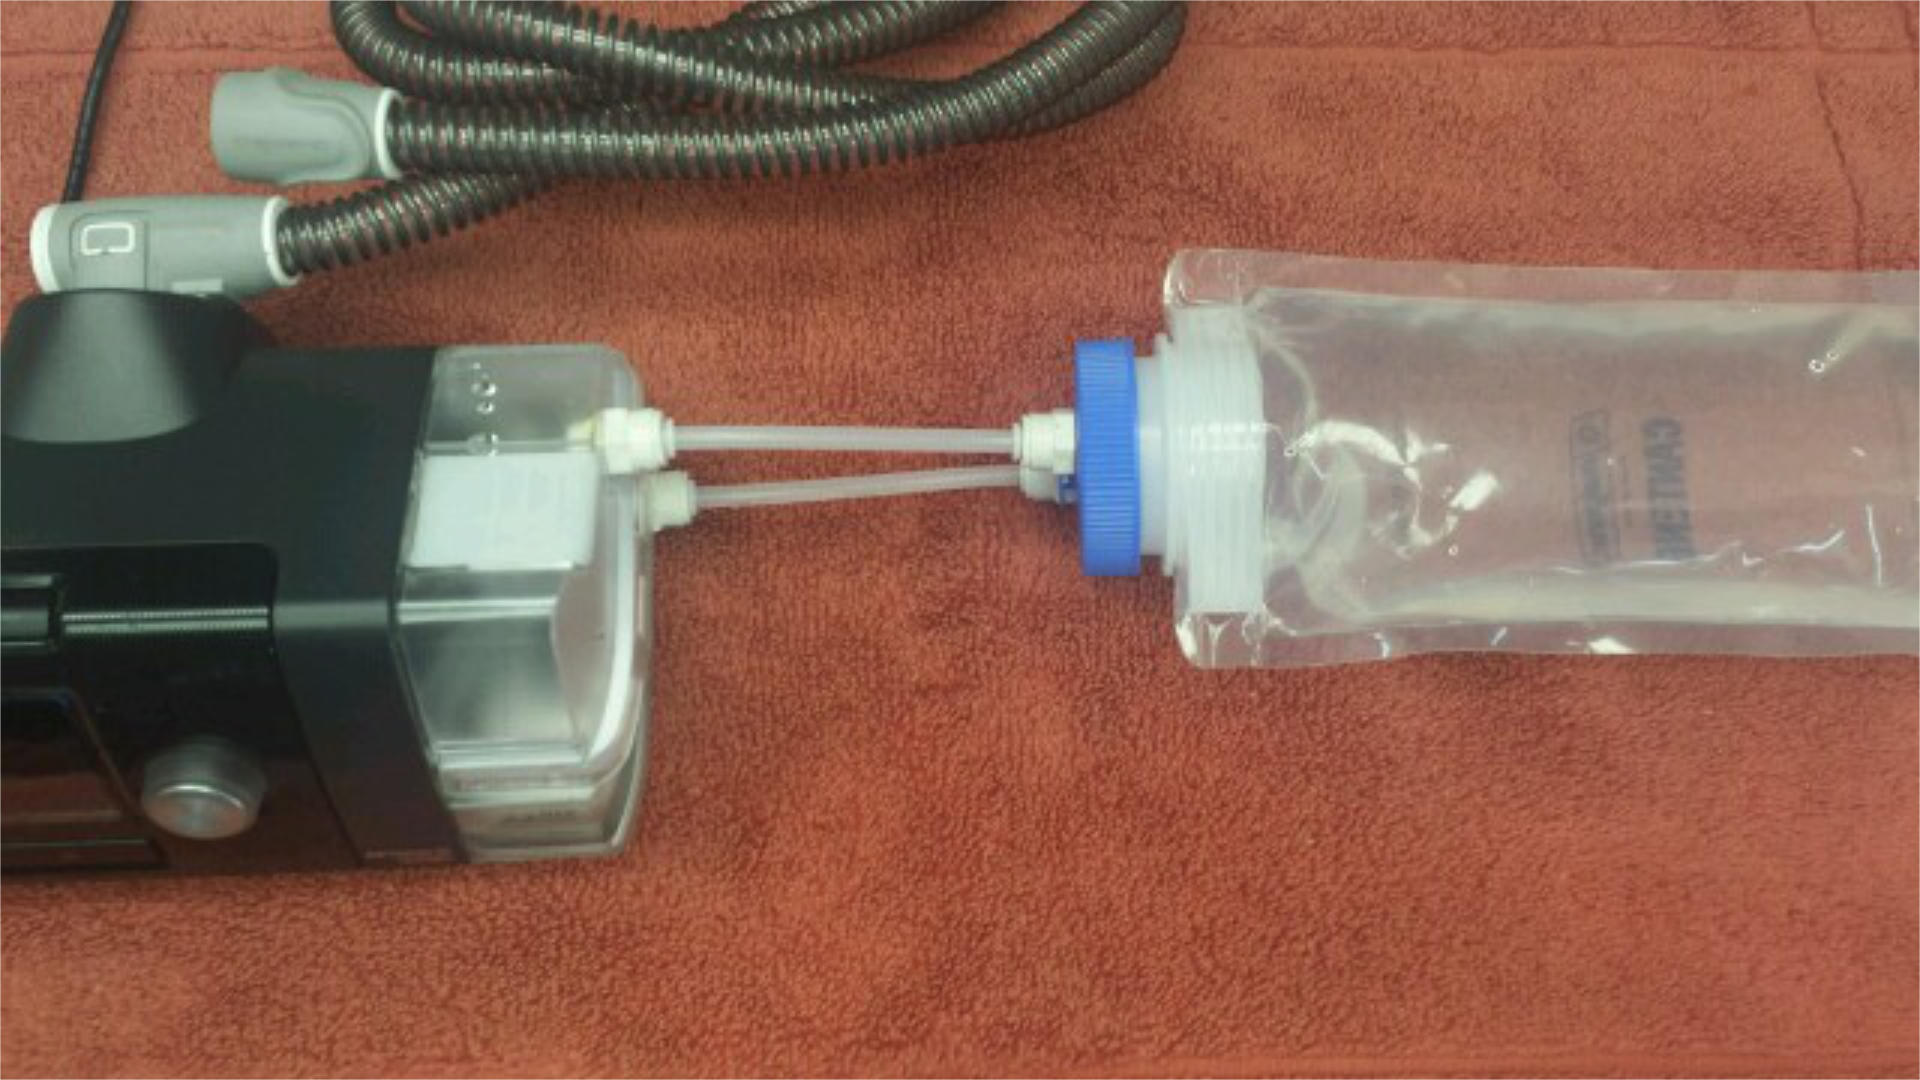
Now, if you’re wondering why there are two tubes, it’s because the bottom one is for water and the upper one is for air. Since the CPAP machine uses pressure you need to have the air flow into both containers otherwise it tries to come to pressure and blows the water in the built-in tank into the secondary tank.
jdm5 took a different approach, and used a large container with a sealable top…
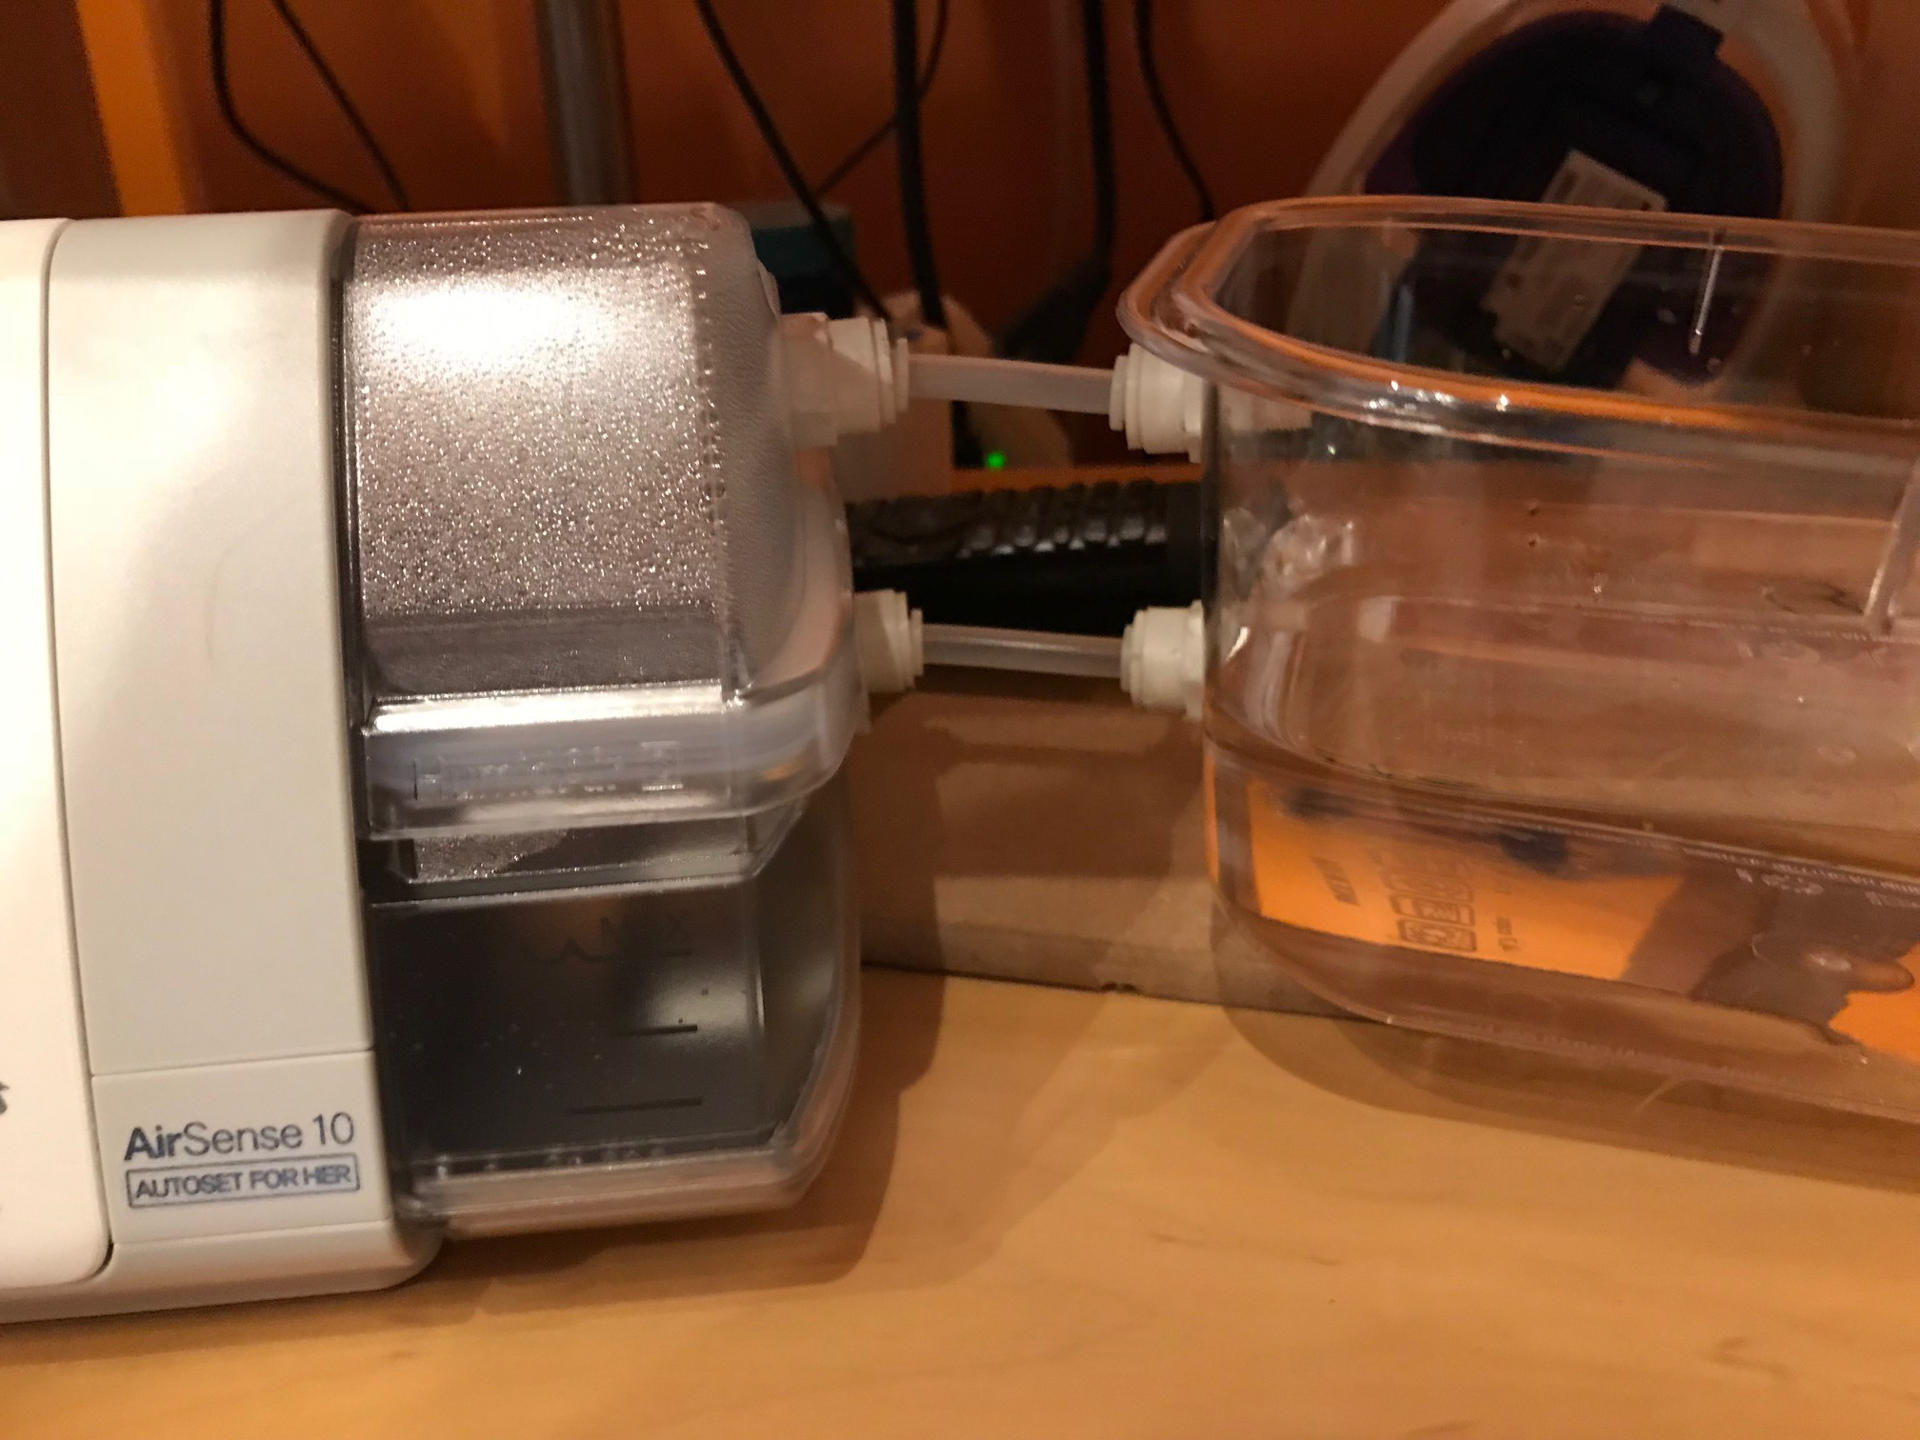
Both of these posts were valuable in figuring out what I was going to do. My build is similar to the one from jdm5 though I chose different connectors. Here are the things I used:
- 1/4″ Hose ID barb Thru-Bulk Bulkhead Fittings x 2 ($14 USD)
- 1/4″ ID (3/8 Inch OD) PVC Clear Vinyl Tubing ($4 USD)
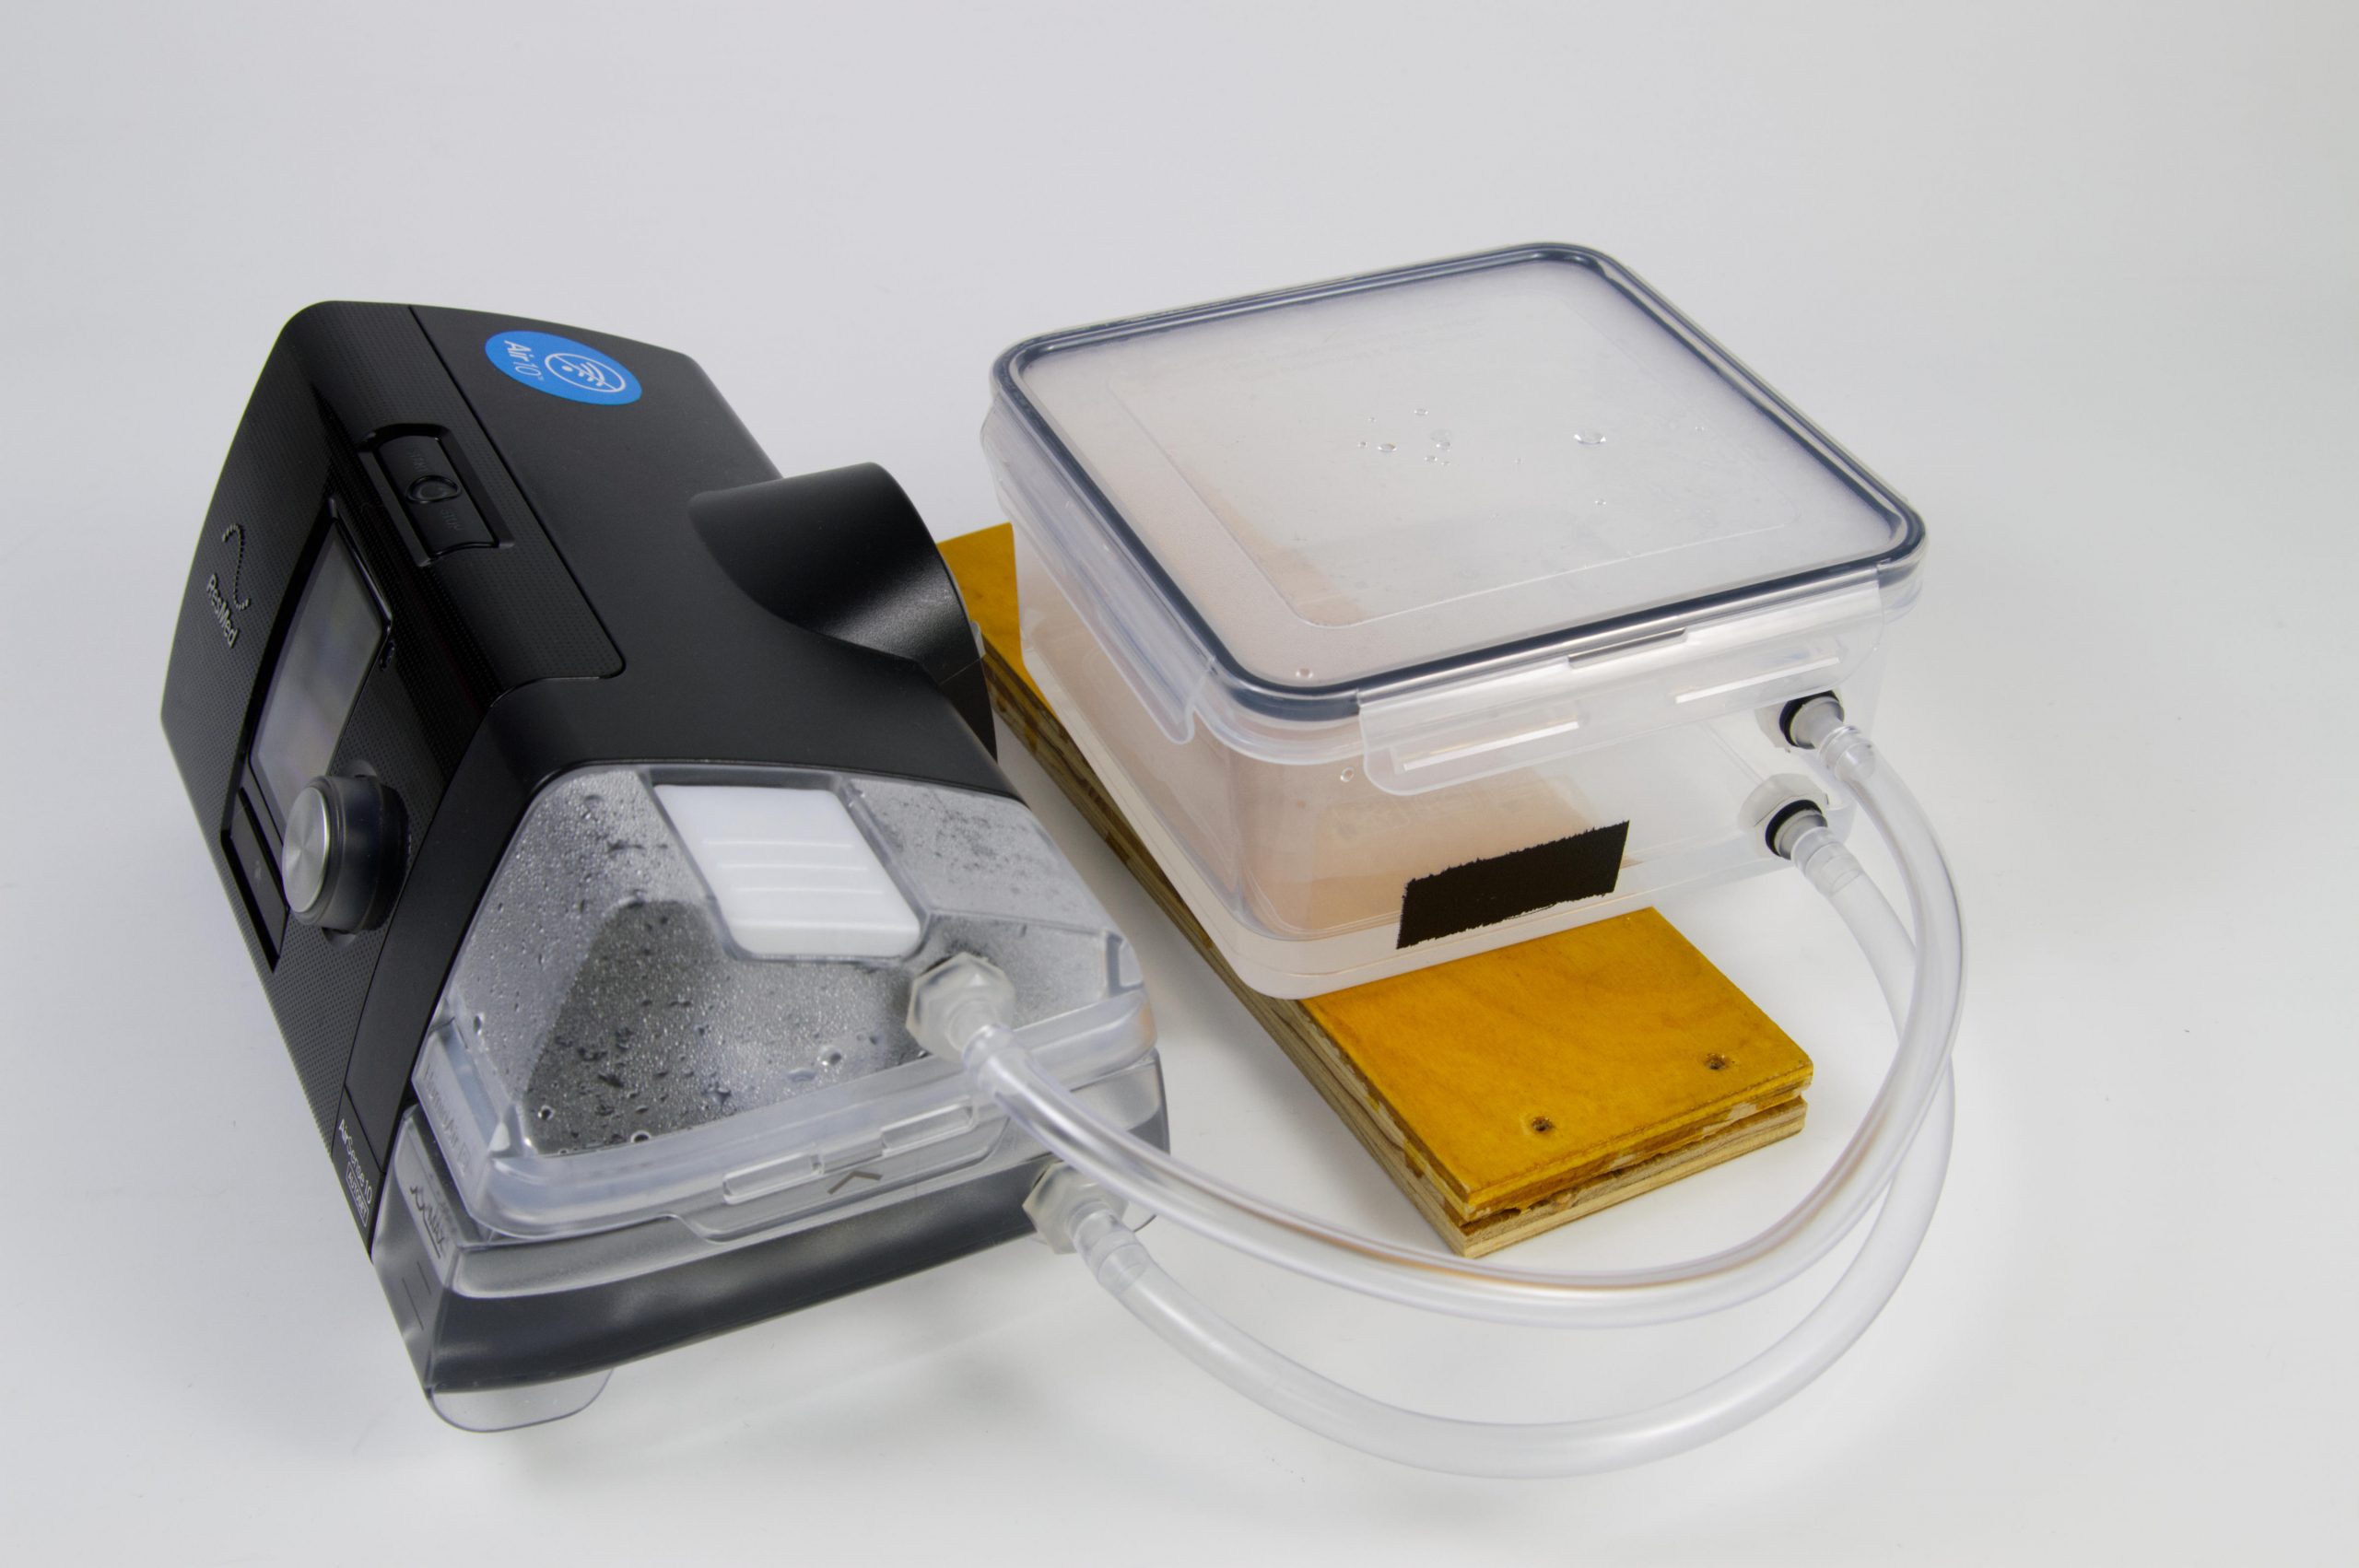
- Transparent Plastic Food Storage Container ($20 USD)
- Rubber O-Rings x 8 ($8 USD)
- Air10 HumidAir Water Chamber ($30 USD)
In total this project cost about $75 USD, but I can subtract the $30 for the Air10 HumidAir Water Chamber because my HRA covers that so it’s not out of pocket for me. In addition I only used one piece of the 40 Piece Food Storage Container Set. If you already have a container or can buy just one that can be a huge savings.
For the Rubber O-Rings I had these on-hand for other projects but you can probably just buy what you need from a local hardware store. The PVC tubing is much cheaper than Silicone, so if you do choose Silicone that price will go up… probably triple or more. And again, you can choose different hose connectors but the ones I chose work for me.
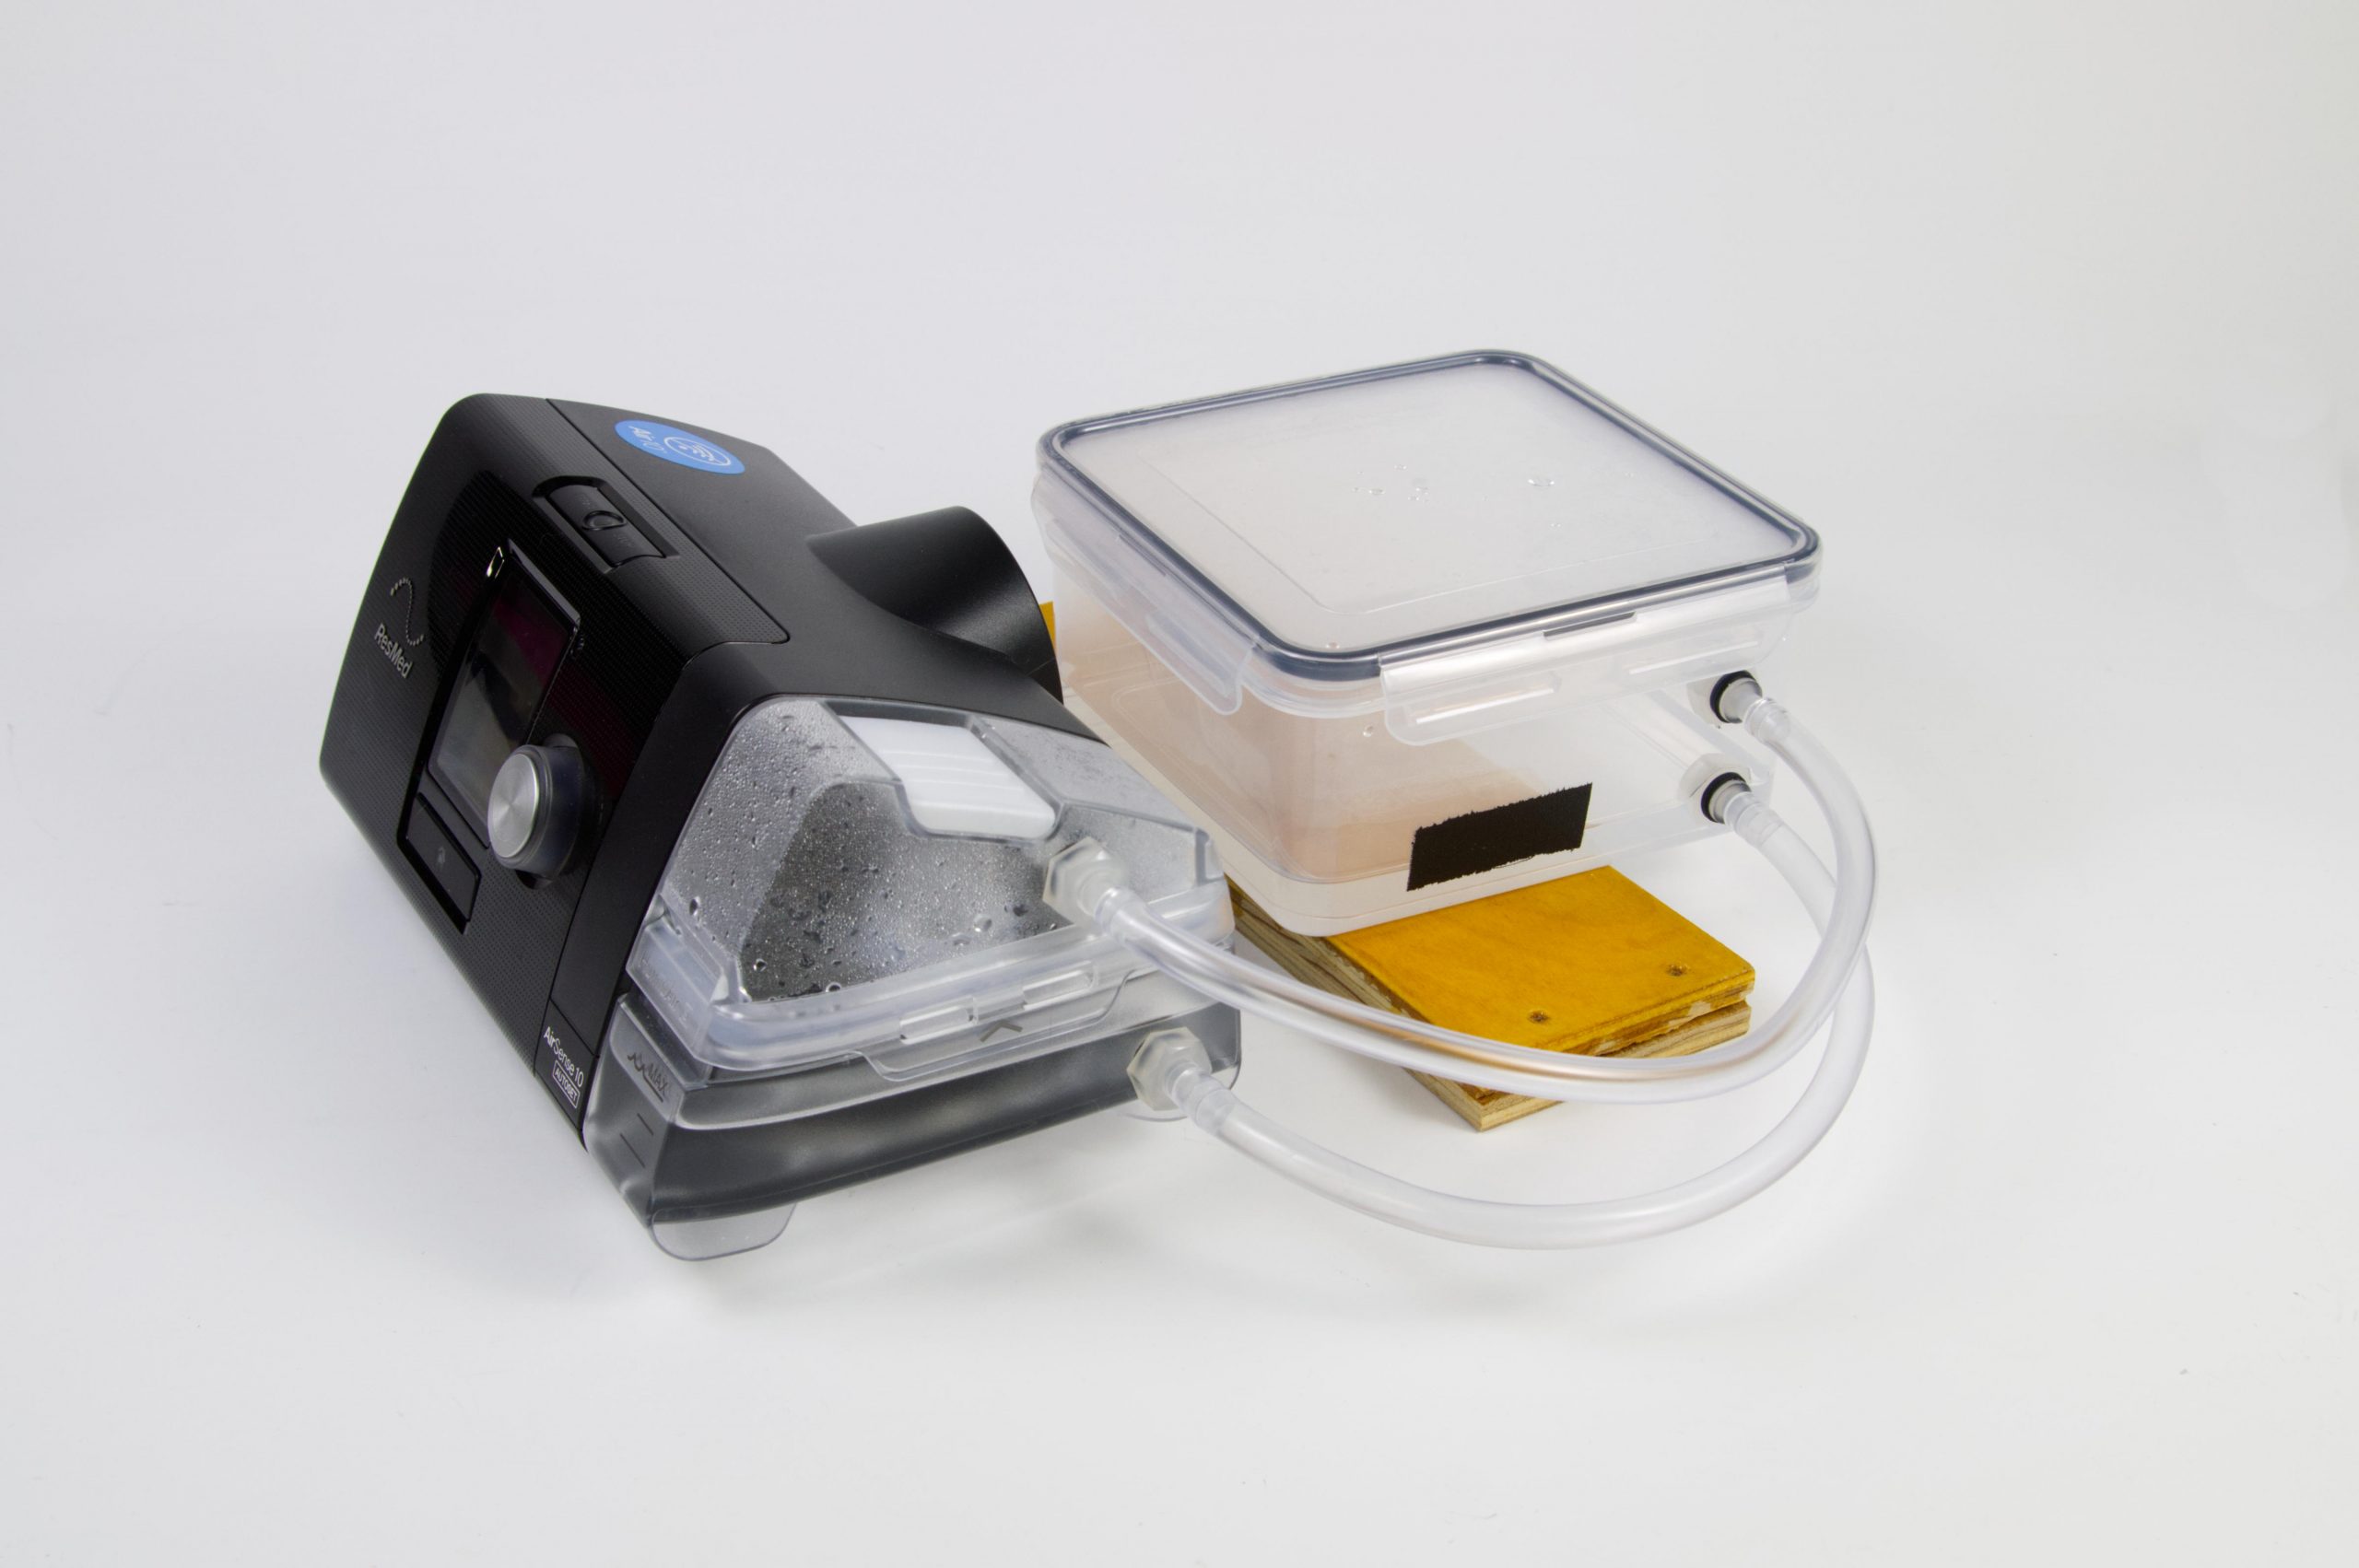
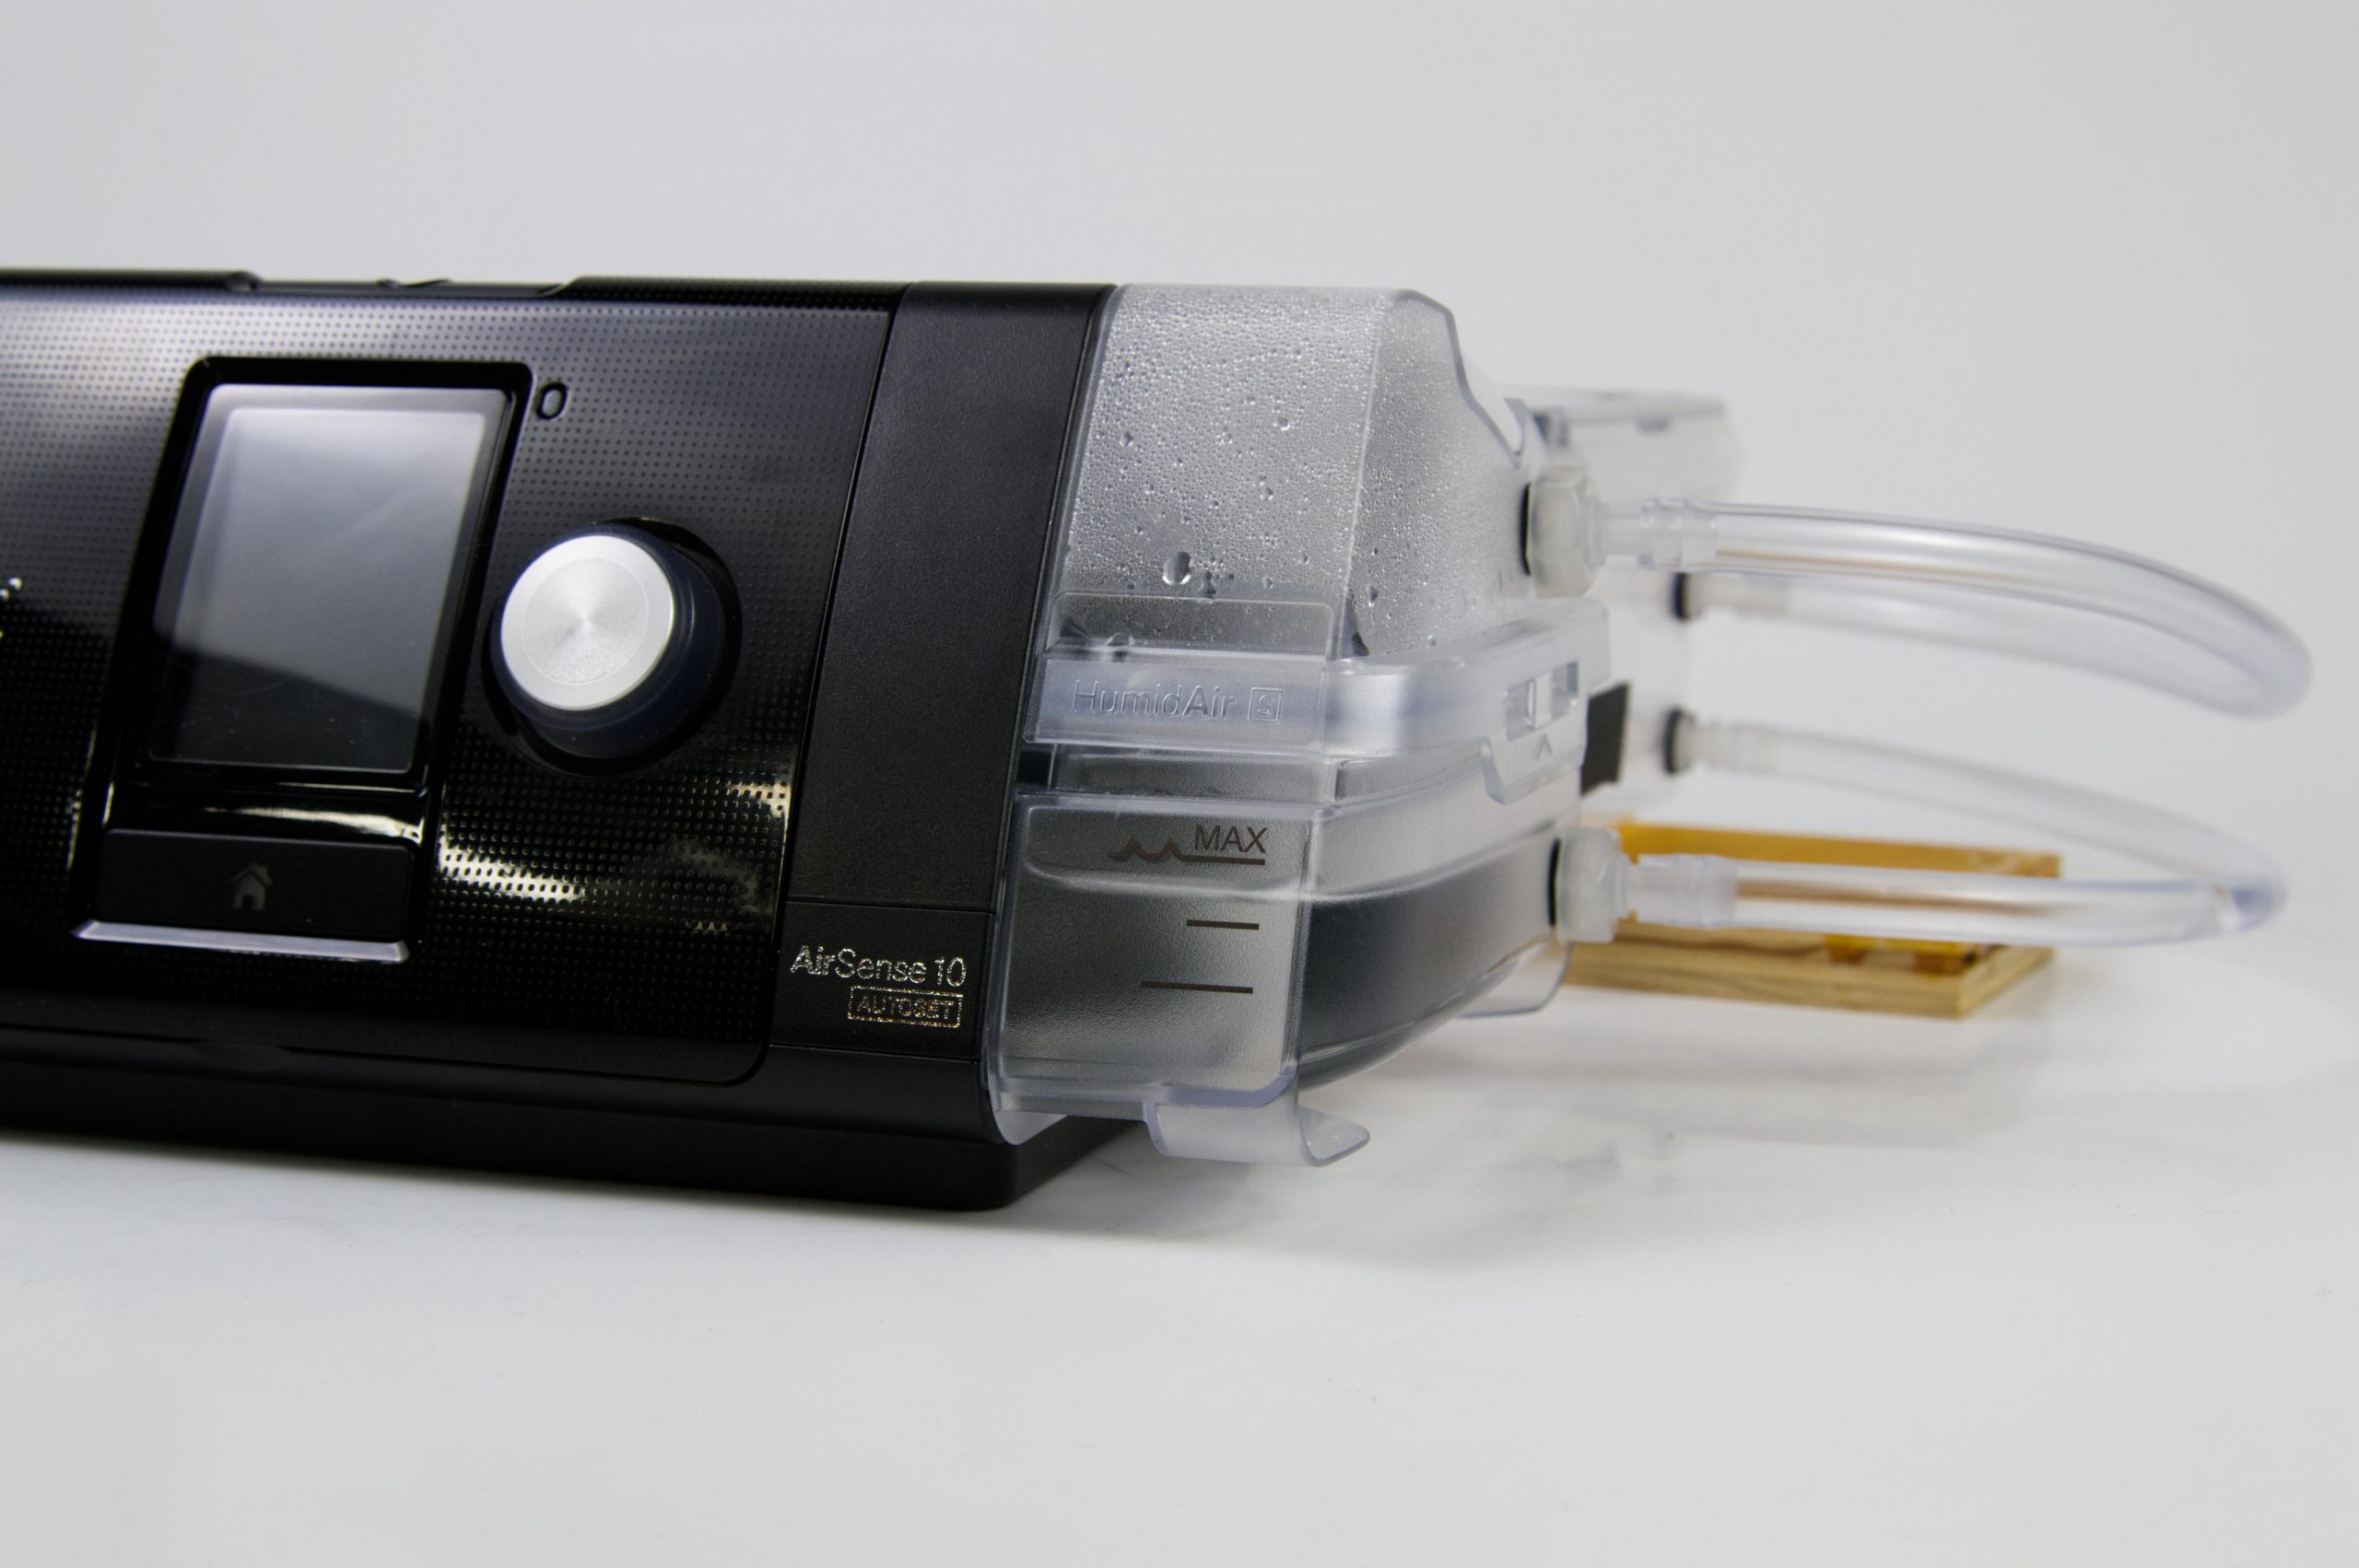
The piece of wood is under the tank to raise it up to the proper level so the lower hose entry points are the same height on the auxillary tank as they are on the CPAP’s reservoir. This is so water will level out between the tanks.
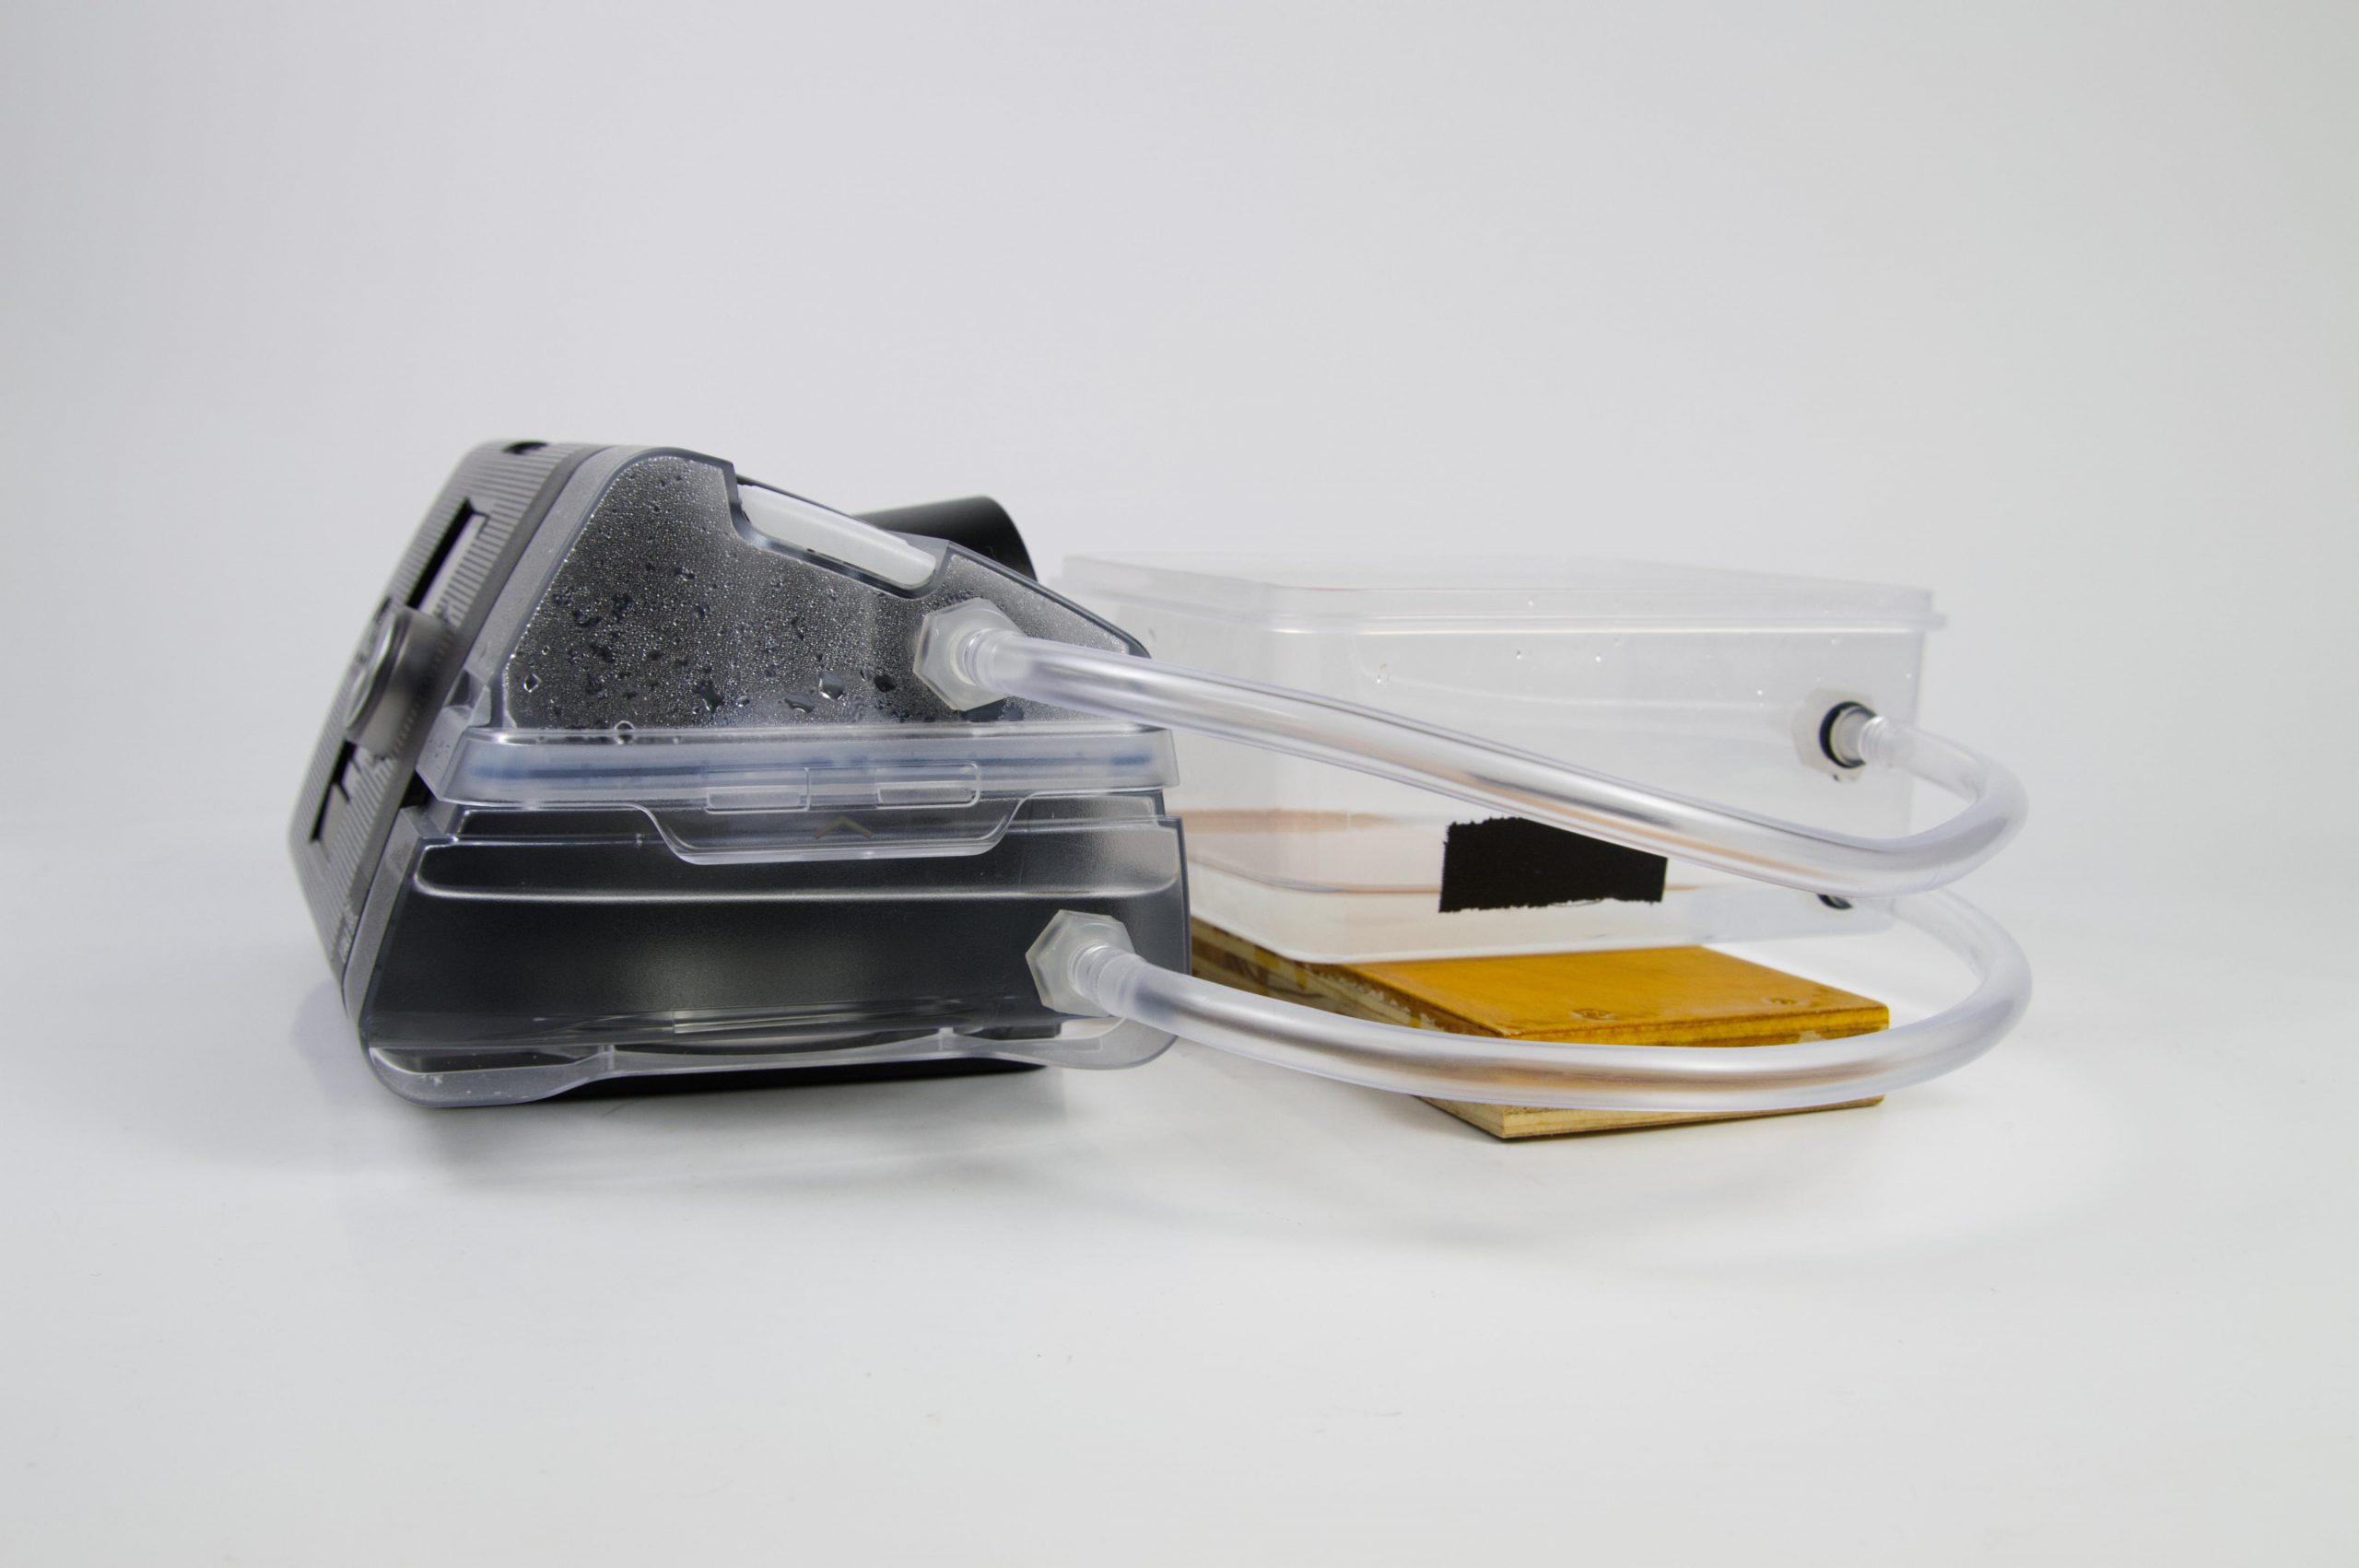
Due to space constraints on my nightstand I need to put my container behind my CPAP machine, not next to it. I just made the hoses longer. I may consider switching to silicone tubing in the future, as it’s much more flexible than the PVC tubing I have now.
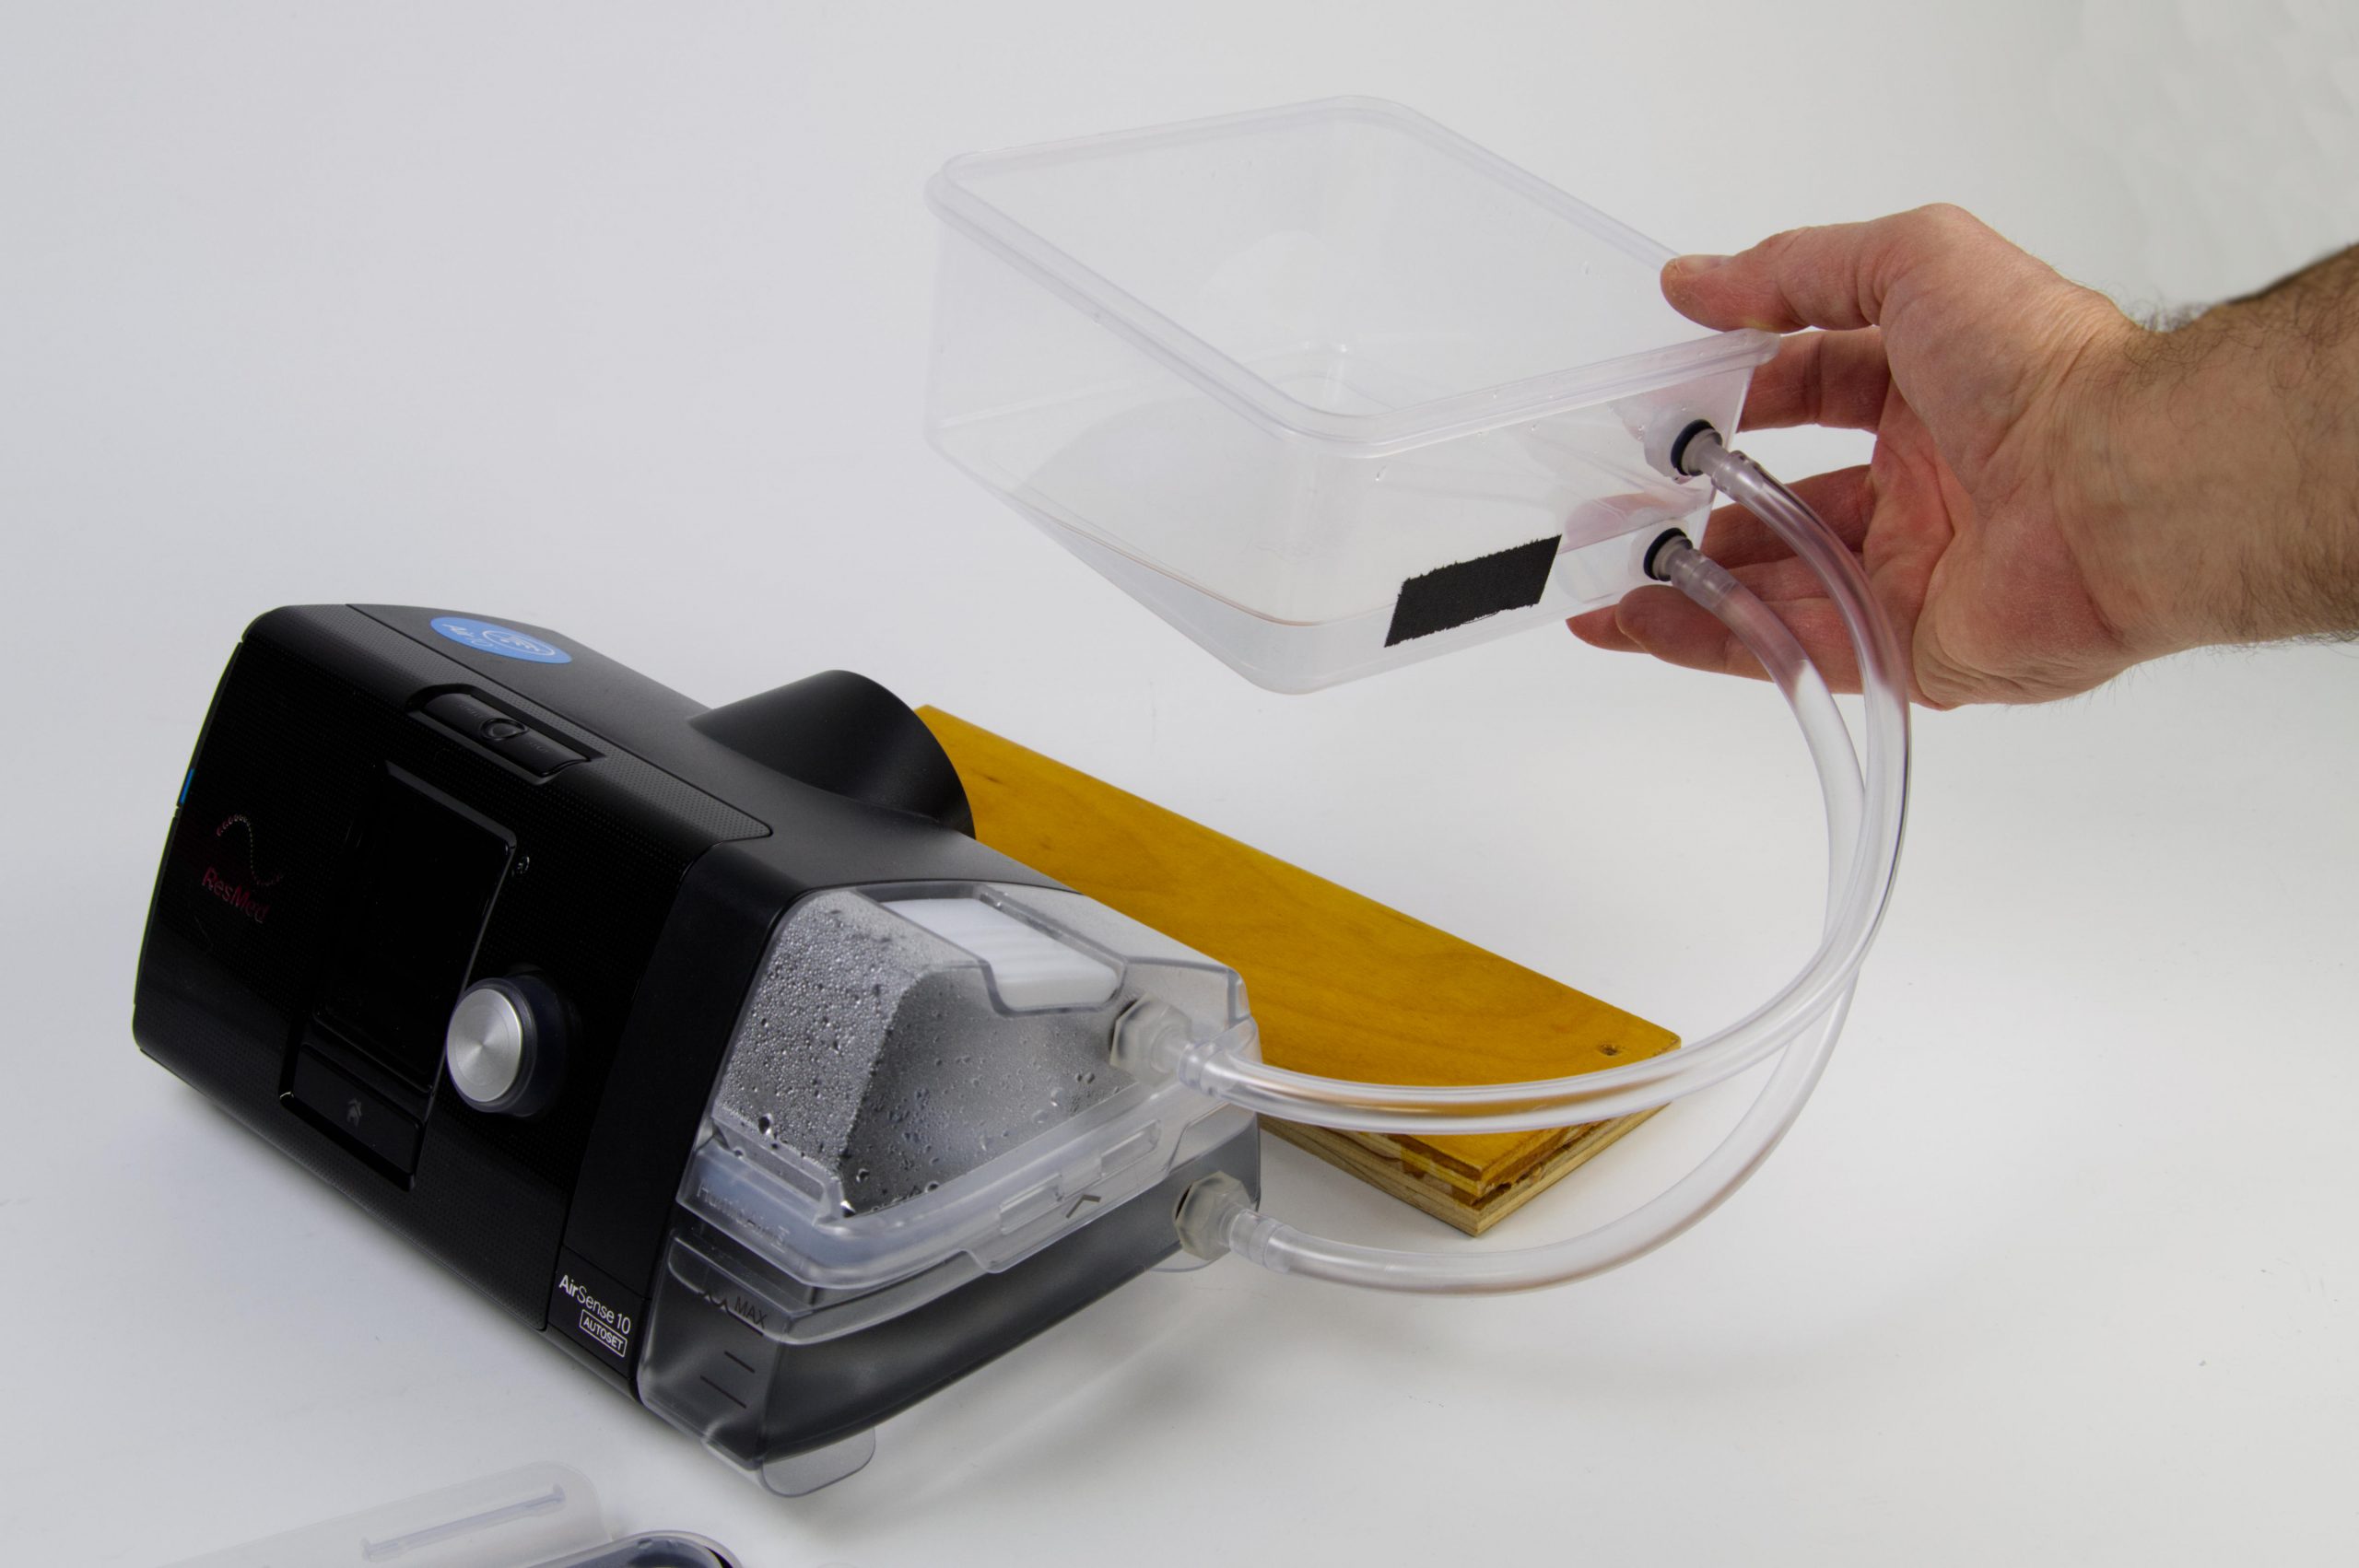
So to use this I just pop the top off the external tank, fill it with water to the “fill line” (where I’ve added a piece of black gaff tape) and then lift the tank higher than the other tank, slightly tilting it so water can flow into the CPAP’s tank. Once the level on the CPAP’s tank hits the fill line I put down the external tank. If need be I can then top it off, but I usually don’t need to as it will be plenty of water to last the night.
This system isn’t perfect, but it’s a huge improvement over what I used to do. This is the best system I could come up with for the lowest dollar amount, and after four months of using this I am fairly pleased with the results.
Note: This post may contain Affiliate Links. Read More.